⇨ No Route or Areas Title appears in this Initial State
⇨ The User must name and initialize a First Track
⇨ He should too Initialize the Parameters Preference File
Then Quit the Application and Give System Permissions
⇨ For the SYSTEM VERSIONS Greater than (MARSHMALLOW)
Gives ALL Permissions
PHOTOS
MICROPHONE
LOCATION
STORAGE
NETWORKS
SYSTEM PARAMETERS
…
⇨ BEGINNING (⋮) ACTION BAR MENU
⇨ (⋮) RECORD a New Track
⇨ (⋮) SET Parameters
⇨ (⋮) SELECT Storage (Int/Ext)
Message : External Memory Card Storage
⇨ (⋮) Save Preferences
⇨ (Escape Touch ↶) 2 Times
⇨ BEGINNING (⋮) ACTION BAR MENU
⇨ (⋮) MANAGE Track Files
⇨ (⋮) Create an Area
Give a Name to the Area
(Be Carefull to choose Good Names !)
Repeat Process as many Times there are Areas to be Created
(6 Areas schould be correct to begin)
⇨ Then (Escape Touch ↶)
⇨ Verify the Areas Names
⇨ Modify the Names if Needed
(it's the Moment to Associate the External Sensor)
⇨ On the current Web Site, search
⇨ ACTION BAR MENU (2) : CREATE a Track
⇨ How to Interact with this Function
⇨ See Tuning PARAMETERS Section
⇨ See Action Bar Menu of this Function
⇨ Search ASSOCIATE Cardio Sensor (12)
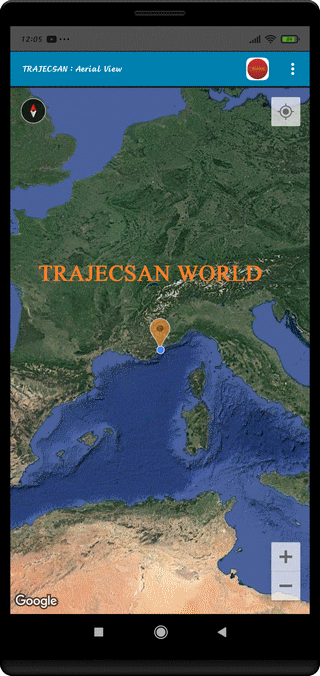
⇨ Orange Marker : Starting Point for SIMPLE OW Track
⇨ Red Marker : Starting Point for Compound Track TO
⇨ Blue Marker : Starting Point for Compound Track BACK
⇨ Light Blue Marker : Existing 360° Panorama
⇨ Cyan Marker : Starting Point Virtual Track (Obtained by Composition)
⇨ Yellow Marker : Selected Geographic Location
⇨ Light Touch on the Application Icon
Hide or Display the Areas List
⇨ Long Touch on the Application Icon
Display Application Name and Version
⇨ Light Touch on the Application Icon
Mapping Tilt (4 Levels)
0° : no Tilt (Camera in Vertical Position)
22° : Low Level Tilt
44° : Medium Level Tilt
67° : High Level Tilt
⇨ Long Touch on the Map
Select Kind of Map (Hybrid, Plan or Satellite Modes)
and Area Designation
⇨ Light Touch on the Map after Selection of a Track
The Track Icon is displayed (GREEN)
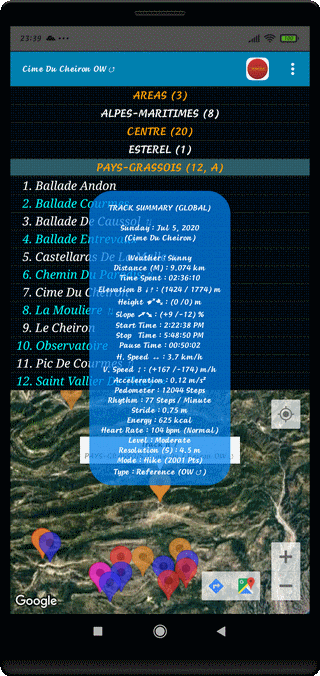
Press the Marker to read the Track Name
Press the Label to Display the Characteristics Synthesis
Long Press the Label to Display the Track Drawing
⇨ Light Touch on the Area Name
Display the Associated Markers of the Area Tracks
 Light Touch on Orange Marker : Starting Point of a SIMPLE OW Track + n° then AREA/Track Name + Kind of Track + Symbol
 Light Touch on Red Marker : Starting Point of a Compound TO Track + n° then AREA/Track Name + Kind of Track + Symbol
 Light Touch on Blue Marker : Starting Point of a Compound BACK Track + n° then AREA/Track Name + Kind of Track + Symbol
 Cyan Marker : Departure of a Virtual Track + n° then AREA/Track Name + Kind of Track + Symbol
 Green Marker : Display Selected Track Label + n° then AREA/Track Name + Kind of Track + Symbol
 Yellow Marker : Selected Geographical Location + n° and Symbol
⇨ Light Touch on a Marker
Display the Title Label of the Trak at this Place
⇨ Light Touch on a Track Label
Display the Track Characteristics
⇨ Long Touch on a Track Label
Display the Path in this Area with the Characteristics
⇨ Long Touch on the Mapping Plan
Area Designation and Change Kind of Map
⇨ Light Touch a Light Blue Marker
 Label of a Panorama (Panorama n°, Area and Locality)
(The Direction of the Panorama is given by the Orientation of the Symbol)
⇨ Light Touch on a Panorama Label
Display the 360° Panorama
For all the Locations Markers, Possibility to Launch the Provider Track Searching
⇨ Select a Track Marker
⇨ Select an Icon of the Track Display at the Bottom Right-End of the Screen
⇨ or Select the Guiding Icon